I recently purchased a PantoRouter, which is a router-based machine (or jig) that creates both sides of a host of joints, including mortise and tenon, angled mortise and tenon, double and triple mortise and tenon, dovetails, box joints, bridle joints, half laps, mitered variations, castle joints, slot mortises, bowties, diamonds and dowels. It uses a pantograph mechanism with a bearing stylus that registers on a robust and affordable template platform to cut the joints. It is a very high quality machine with excellent fit and finish that is easily calibrated and set up for cutting joints. It is also very refined at this point (mine is a V5 and they seem to have thought of everything).
Machine joinery was a missing capability from my shop. I considered a hollow chisel mortiser, as well as the router-based solutions on the market: Multi-Router; Router Boss; Leigh M&T, and Domino. I went with the PantoRouter, but a Domino is also in my future because sometimes it’s better to take the tool to the work.
The first project with the PantoRouter was to build a workstation for it. This is the build.
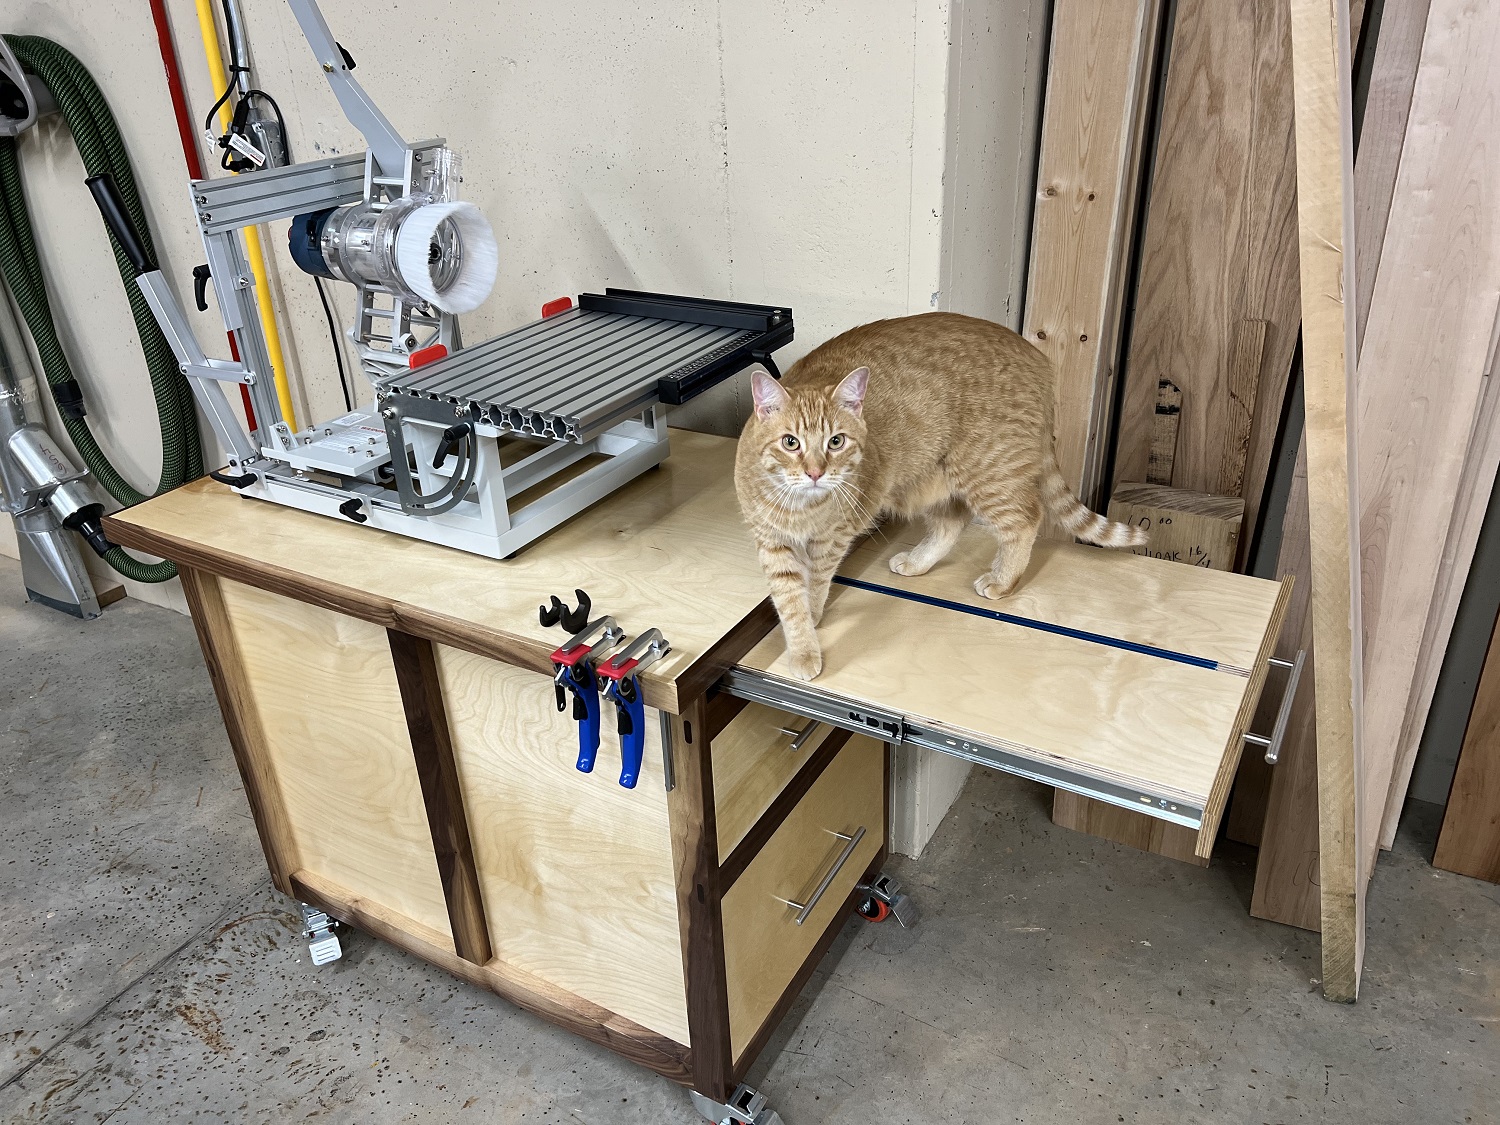


The frames are walnut and the panels and drawers are Baltic birch ply. Making the joinery with the PantoRouter really put a grin on my face. Every joint came out perfectly and the frame snapped together nice and square. I was blown away.


The drawer boxes are constructed with locking rabbets.

I mounted the inset drawer faces flush with the frame and used stainless steel drawer pulls from Home Depot that match the hardware on my other shop furniture.

Doubled up 3/4″ ply (glued and screwed) is used for both the top and the auxiliary table. Baltic Birch is used for the top layer, and cheaper stuff for the bottom layer. The top was then edge banded with 3/8″ walnut resawed from some left over scrap.

Speaking of drawer faces, the face for the auxiliary table was a bit tricky. Usually I shim the drawer faces in place and temporarily attach them to the drawer boxes through the hardware holes, then pull the drawer out and screw the faces on from the inside. However, the face for the auxiliary table has to be attached with the hardware already installed and the drawer out of the cabinet. Furthermore, I didn’t want to make adjustments to the drawer slides to center the face because I had already gone to great pains getting them co-planer with the table top. Here was my solution:
I drilled small pilot holes in the drawer face for the drawer pull hardware. Then I shimmed the drawer front in place and drilled pilot holes in the auxiliary table, using the pilot holes I had pre-drilled in the drawer face as drill guides. I then removed the face and used a forstner bit of the same diameter as my drawer pull screw heads to drill clearance holes for the screw heads into the auxiliary table, using the pilot holes as a guide for placement. The screw heads for the drawer pulls acted as indexing pins for the drawer face when I went to glue it up. I added red locktite to the hardware screws before gluing on the drawer face because they are permanently entombed at this point.


A section of T-track is added to the auxiliary table, which allows the work support to be secured in any position on the auxiliary table front-to-back. The groove in the work support base also allows left-to-right adjustment on the table, which is handy if you need to rotate the PantoRouter 90 degrees on the table to support a long workpiece in the other direction. The box joints for the work support were made on the PantoRouter, which was very quick and easy.


The table can be locked fully open with a T-track stop block.

The work support fits nicely in the drawer.

Bit and bearing guide tray for the top left drawer.


Custom trays are planned for all the templates, but I haven’t gotten to that yet, so for now they are just sitting in the drawers.


Despite having everything comfortably stowed in the drawers (inefficiently due to the lack of custom template trays), The biggest drawer is still completely empty! This cart has storage galore.

I’m very happy with how this turned out. I love the design of the cart.